Tuesday 16 September 2014

Alice In Wonderland dressing table..


Sometimes a client knows exactly what he wants, but lets you make it work your way..

Matt and I had a chat a little while ago, about a piece of 'upcycled' furniture to fit in the master bedroom, of the lovely old mill where he and his family live. The idea was to have a chest of drawers that would be covered in different 'off-cuts' and timbers to create a truly unique piece of furniture.
When he came to my workshop to see what I had found, there was a slight change in direction.

"Can you make me a dressing table for Cathy first..forget about the drawers for a bit"

So I went through a few Fine Woodworking Design books with him.. and he was "yes.. like this"

To give them some inspiration, I lent Matt a couple of design books to show his children, I also asked them to write down what Mom does at her current dressing table.. What they came back with was amazing..

A list of requirements..
  • Somewhere for hairdryer and jewellery, and her 'stuff'
  • She puts her hair straighteners on the floor.. "can you make somewhere for them, please"
  • She wears bangles, "what about keys, fob watch, rings" Says Rui
  • Prosecco, "somewhere for a bottle of wine"
The list went on.. and on .. and on..

we chatted. The next time they came "Alice In Wonderland" 

"Blimey.. I was just so excited by this.. crikey.. This we could go Mad with this.. " and Matt and I did..We drew and scribbled..

A few days later, I went over to their beautiful old Mill, to see the space.. the light. To get an idea of what they like, what they have around.. Matt likes thing that are very different. Over a coffee, in their kitchen he started to sketch some ideas, " can you make this" he'd say.. " yeah that sounds great, I could do this or that" etc.. just a great design review. I left with lots of 'scribbles'

Inspiration I got from old books, the internet, and tattoo's

Here are some that made me think.. 


I love the perspective of the flooring on this back piece (ouch)..


The lifting of a lid, And Matts idea of the tapered leg.


Just look at the hole  with the tree growing around it..


the madness of it all...


I hope you like it, I have loved making it..


Oak 'tree' base, with door in the main body. A toadstool supports the Maple leg

Well why not !


On the tree, carved where you would carve it if you were sitting in the tree..
Matt carved the heart and the arrow..
then asked me to just go over his writing with a sharp chisel


The top is of Maple, with the lid in Padauk and Maple.


The right hand end is where the tree meets the fence.
Panels of random widths, tapering with 'gaps' and doweled in place.
Using timber 'with' knots in.. trying to find my worst examples of Oak to bring life to the piece..

It was mad.. and making that lid.. with my eyesight, was tough


Walnut and Maple dovetailed drawer, with lined base to take jewellery...


I love the tree coming out of the top, an Art Deco mirror hangs from it with the inscription

"You're entirely bonkers. But let me tell you a secret.. All the best people are."

and yes it has a couple of hiding places and a secret drawer..we just had to


The hole at top right on the front.. takes Cathy's hair dryer, and wont fall out,
A tile sits inside the 'tree door', for Cathy's straighteners to cool down on.


With the lid lifted, Walnut and Maple with a lined base,
The Maple panel takes the hinges but also has a slot in the top to take love letters or notes..


The drawer front is made so that it has the feel of blending in when shut.

It was going to have a button knob on the front, but we felt that the button 
would spoil the simplicity of the left hand side

With some fun with dates, completing it was busy but on a real high. Delivered to Matts house at 7pm the night before Cathy's 40th birthday, while she was out.


The Mad Hatters hat, sits on the left hand side of the dressing table


In Oak with carved brim not bent or laminated.

Matt came to my workshop to sand down this hat to get exactly the right fading of the Blue Dye


Lined with the same velvet as the drawers,
this could take a bottle, bangles or whatever Cathy wants.


I will be going over to the house once the celebrations are over, to set it into the dressing room and give it a polish up. hopefully I'll get to dress it with all of the other bits and pieces that have been bought to make it a real one off.

thanks for looking

Jamie 

Tuesday 2 September 2014

Pallet drinks coasters... How to make them


I started this blog post a while ago, but felt unsure about putting it on here, but they are quick and fun to do..

If you follow me on Twitter, you may have seen these already.


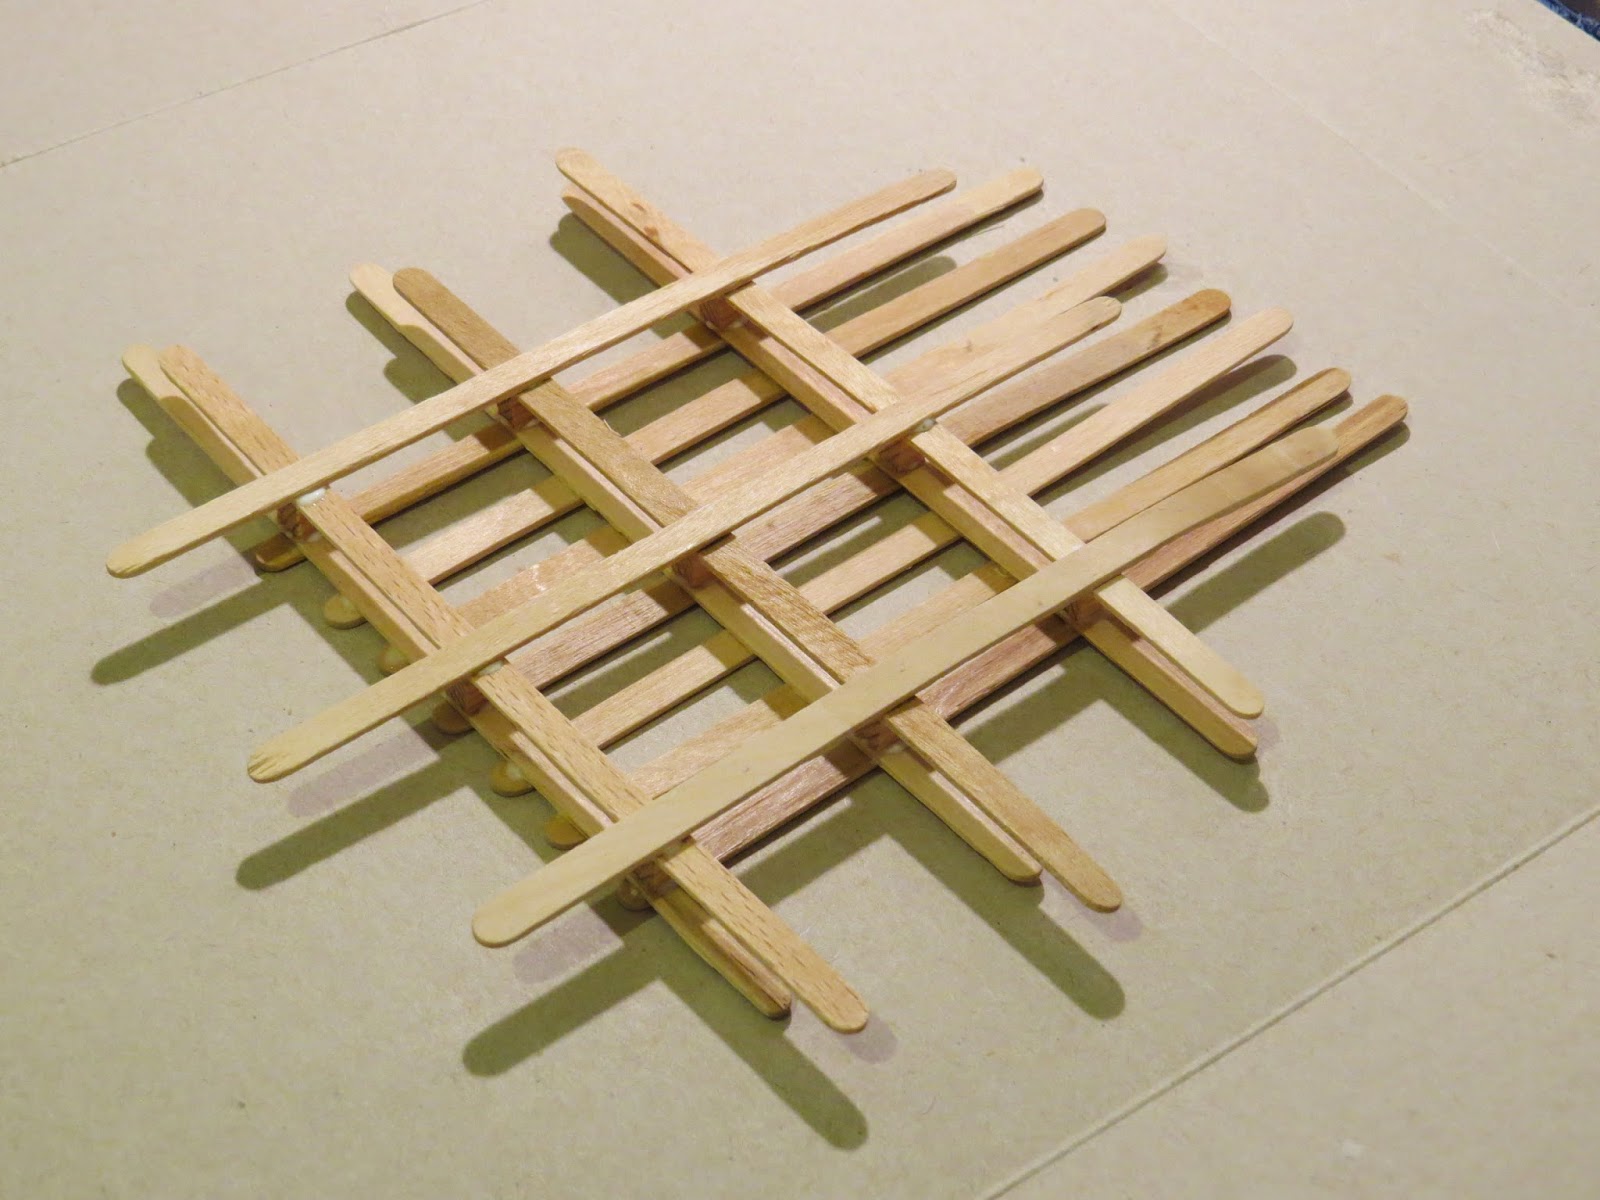
These pallet coasters I made from Ice cream sticks, I've been using the sticks for applying and removing glue for ages now, but the collection of sticks seems to grow quicker than I can use them.. So I made the pallet coaster as a perfect 'second use' item, I just wash them in warm water as I clean up my coffee and tea cups.

After making these two, I was thinking of what other wooden sticks could have a second purpose.. then it hit me.. coffee sticks, as I was in the cafe at The Ruskin Glass Centre, where I have my workshop. They have a small table top bin, for sugar wrappers and these sticks..  lots of them..


Now, I see people making these out of new wood and selling them for all sorts of money.. £20.00 for four, just Google it and see.. new wood, at least these are made from used sticks about to be thrown away..

This to me is madness.. what's happened to using spoons anyway ..

Anyhow, while they are still around I'll make them with the students from the Glasshouse college. I have a couple of work experience sessions each week with a student and this type of item gets them to focus on what they are doing. It takes me a few minutes to make one, it can take a student a lot longer than that. But it also helps the student with where to put their cup when we have a cup of tea. Because they then have an association with the item.

So, over the next few photos I'm going to show you how to make them. But you must use used (and wash them properly) and if you are pleased with them, send me a pic and I'll put it on here after the instruction.

Here goes

And read through it all first

You will need
  • 16 Sticks to make one pallet
  • PVA or white glue
  • 9 blocks to fit the width of your sticks (can be made up of small squares of extra sticks glued together)
  • Heavy weight (I used a brick)
  • A saw of some type preferably with as few teeth as possible
  • Some sandpaper, fine grade will do


Start with 13 sticks as shown. Try to use the straightest you have
The bent ones can be used for underneath.. 


Now put a spot of White glue (PVA) on the ends of the sticks.
Start at the corner and place glue on every other stick as shown


Place the first stick onto the glue. Then place 5 more sticks next to it as shown. 
I put the next stick to be glued down, a stick width away from the last one, 
this leaves me a gap to put the glue. Place the 7th stick onto the glue.


Then place another 5 sticks. Glue the next stick down, this should be number 13. 
Place a heavy weight onto the assembly for a while
I leave about half hour.


Remove weight, and take out the spacing sticks. That last one has a little glue on it, 
so I'll just 'pop' it off..making sure I support the glued one next to it.


Then turn over, and while supporting the fixed sticks, 'pop' out the spacing sticks..


Now put a spot of glue on each of the intersections as shown


Place the small blocks as shown,
then put a spot of glue on the top of each on them


Place these sticks in the same direction as the ones directly beneath the blocks


Then glue the next layer of sticks in the opposite direction to the last.


Then place under a weight again
Here I'm using a previously made pallet with two being pressed.


Leave overnight or as long as you can, then very carefully, cut off the ends
then sandpaper all over, seal with a varnish if you want. I just leave them..

And remember, those ends can still be used for glue sticks 
or blocks for the next pallet coaster you might make


Here they are done.

So, if you follow this and make some for yourself, 
email me a pic and I'll put it on here.. and share designs and ideas etc. 

And remember use USED sticks, don't cheat ..  

Have a great day

Jamie 

* * * * *
Gallery of Pallet coasters


Isaac 13 & Naomi 10, are the first to get their Pallet coaster on here. Very well done, It looks great.
Andrea, can you tweet me to let me know you've seen this, Jamie.


Who's will be next...